By default, Storytailor will inherit and use the fonts that your website uses as long as your keep your Font as “inherit”.
If you’d like to use a different font, you can use any of the pre-loaded of fonts that come with Storytailor or you can choose a web font. You can add any hosted font (from services like Google or Adobe) to Storytailor in just a few quick steps.
Step 1 — Identify Your Font
You may already know the name of the font you wish to use. If you don’t know the font name, in Storytailor go to Help > Contact Us and we can help you identify it.
Step 2 — Add a Web Font in Storytailor
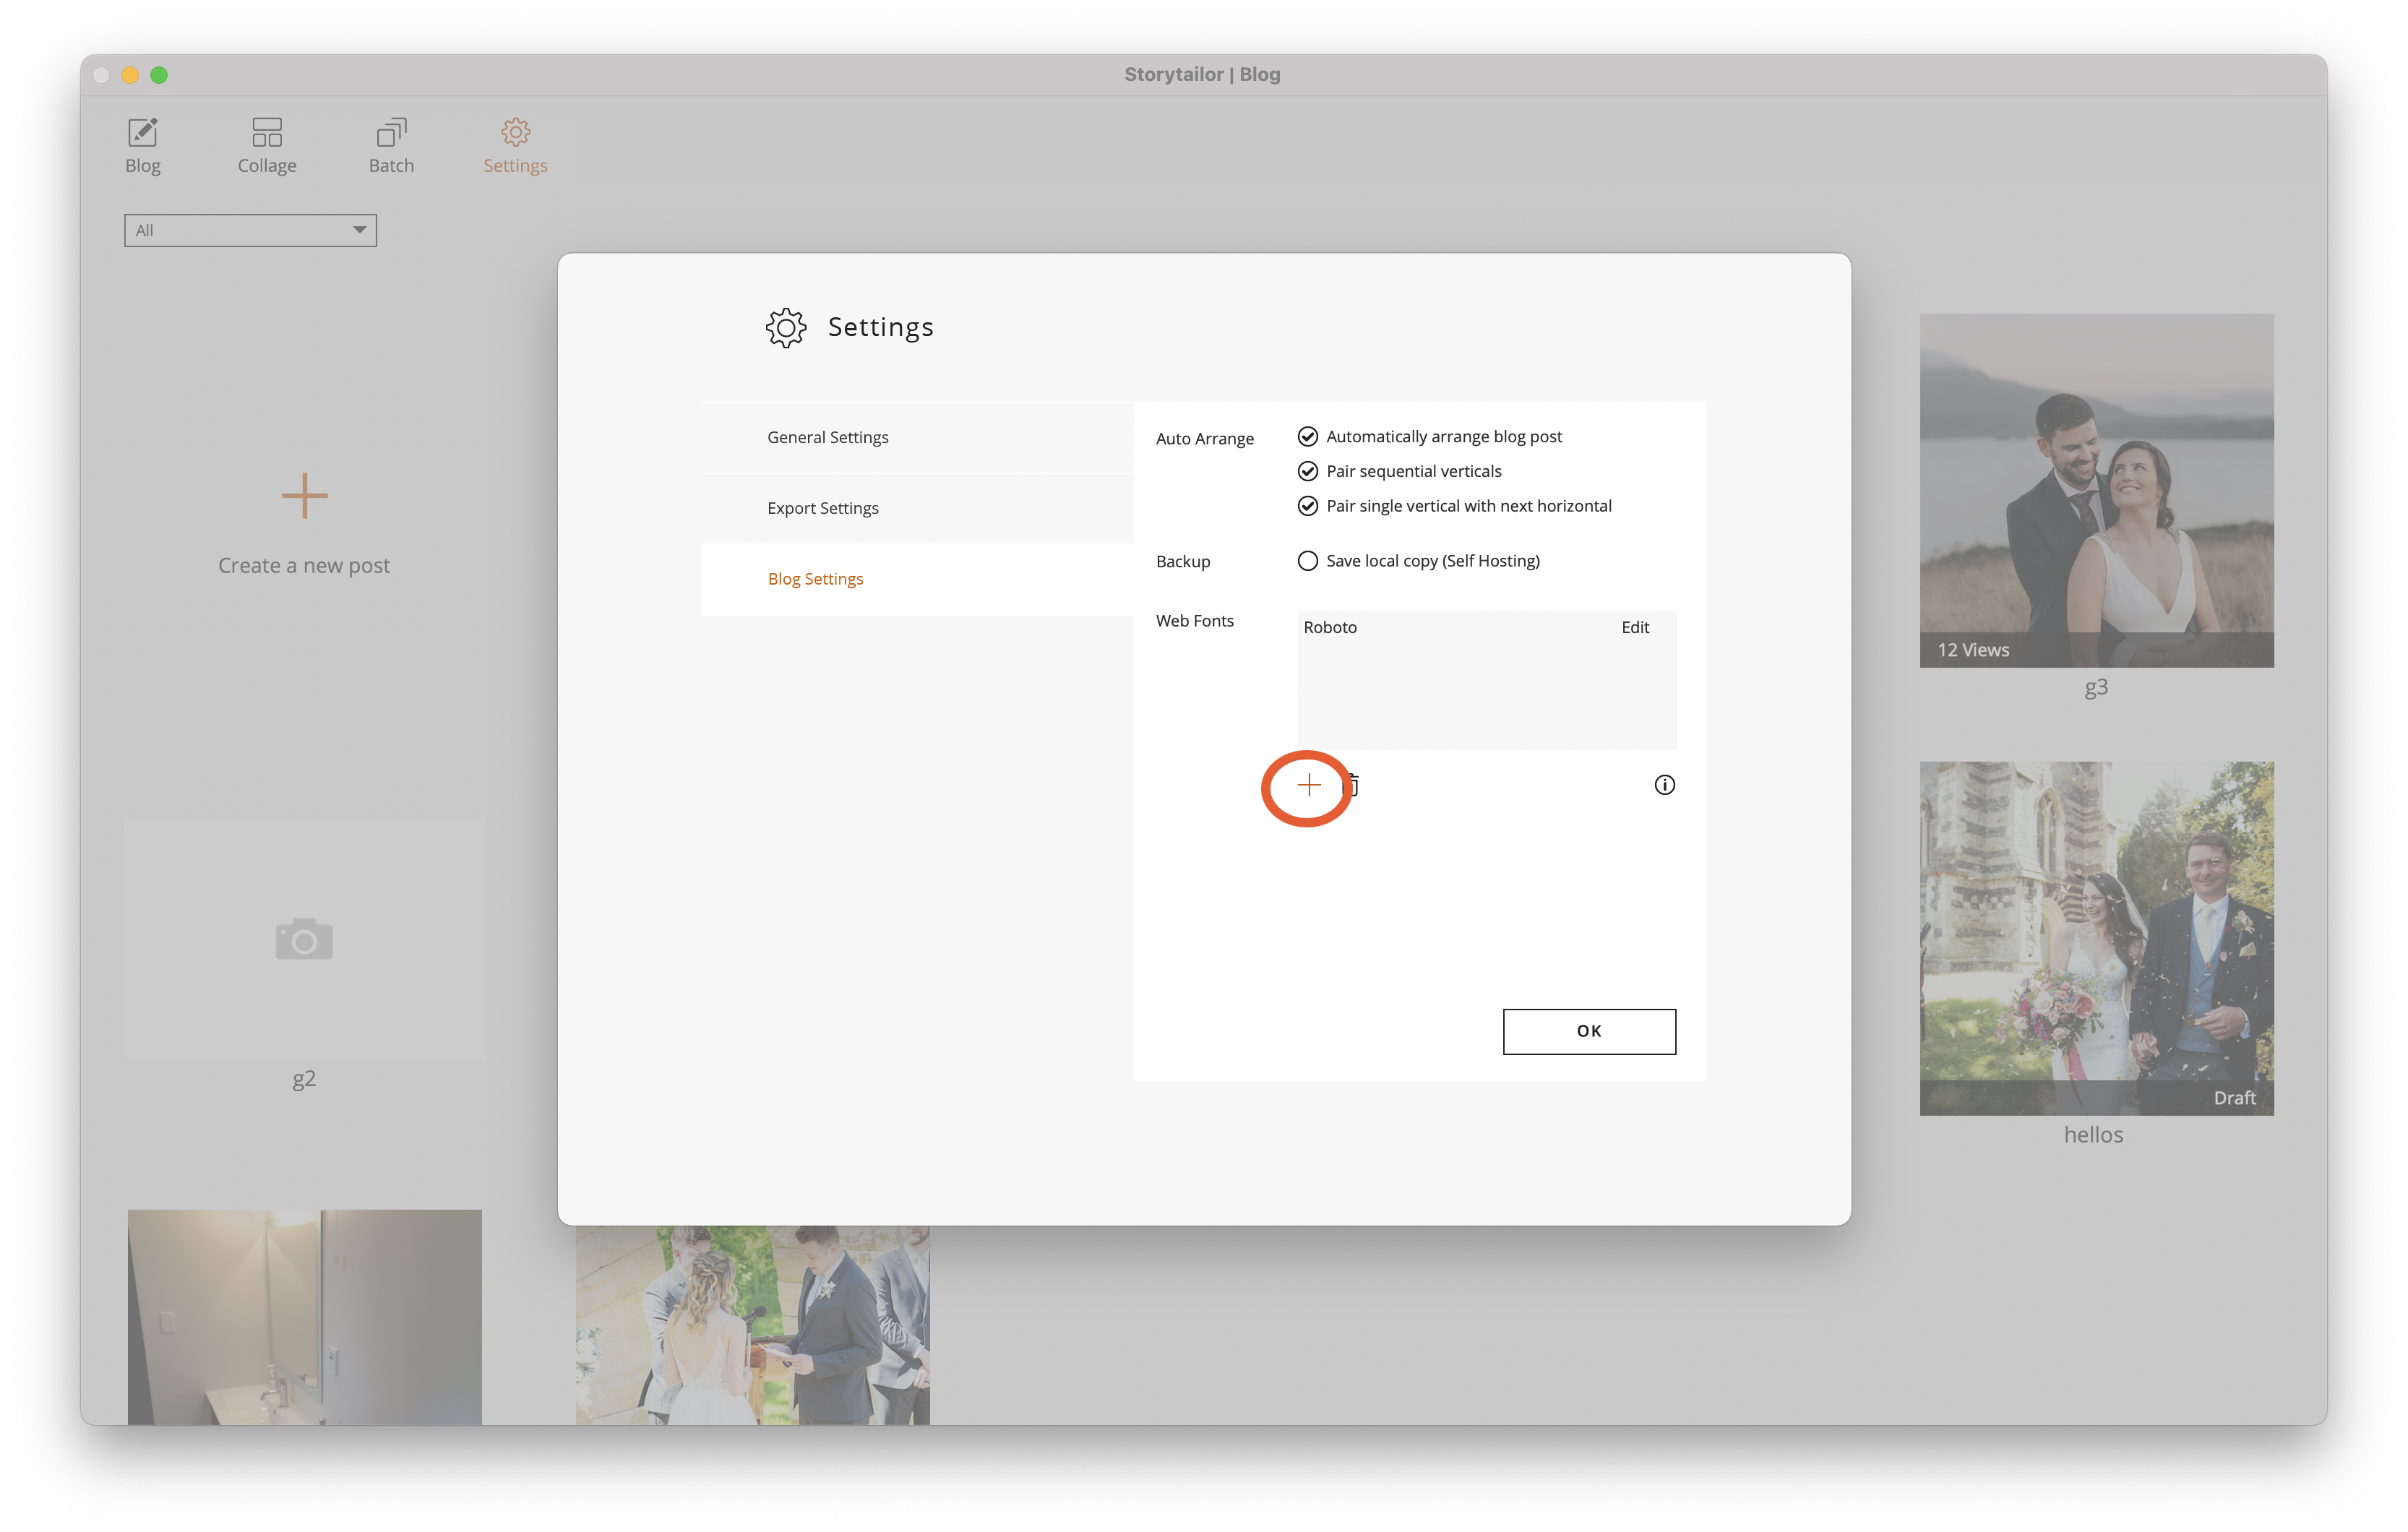
In Storytailor | Blog, open the Settings menu. Select “Blog Settings” and then click the “+” under the font list. An input window will open — leave it there for the moment.
Step 3 — Search for Your Font
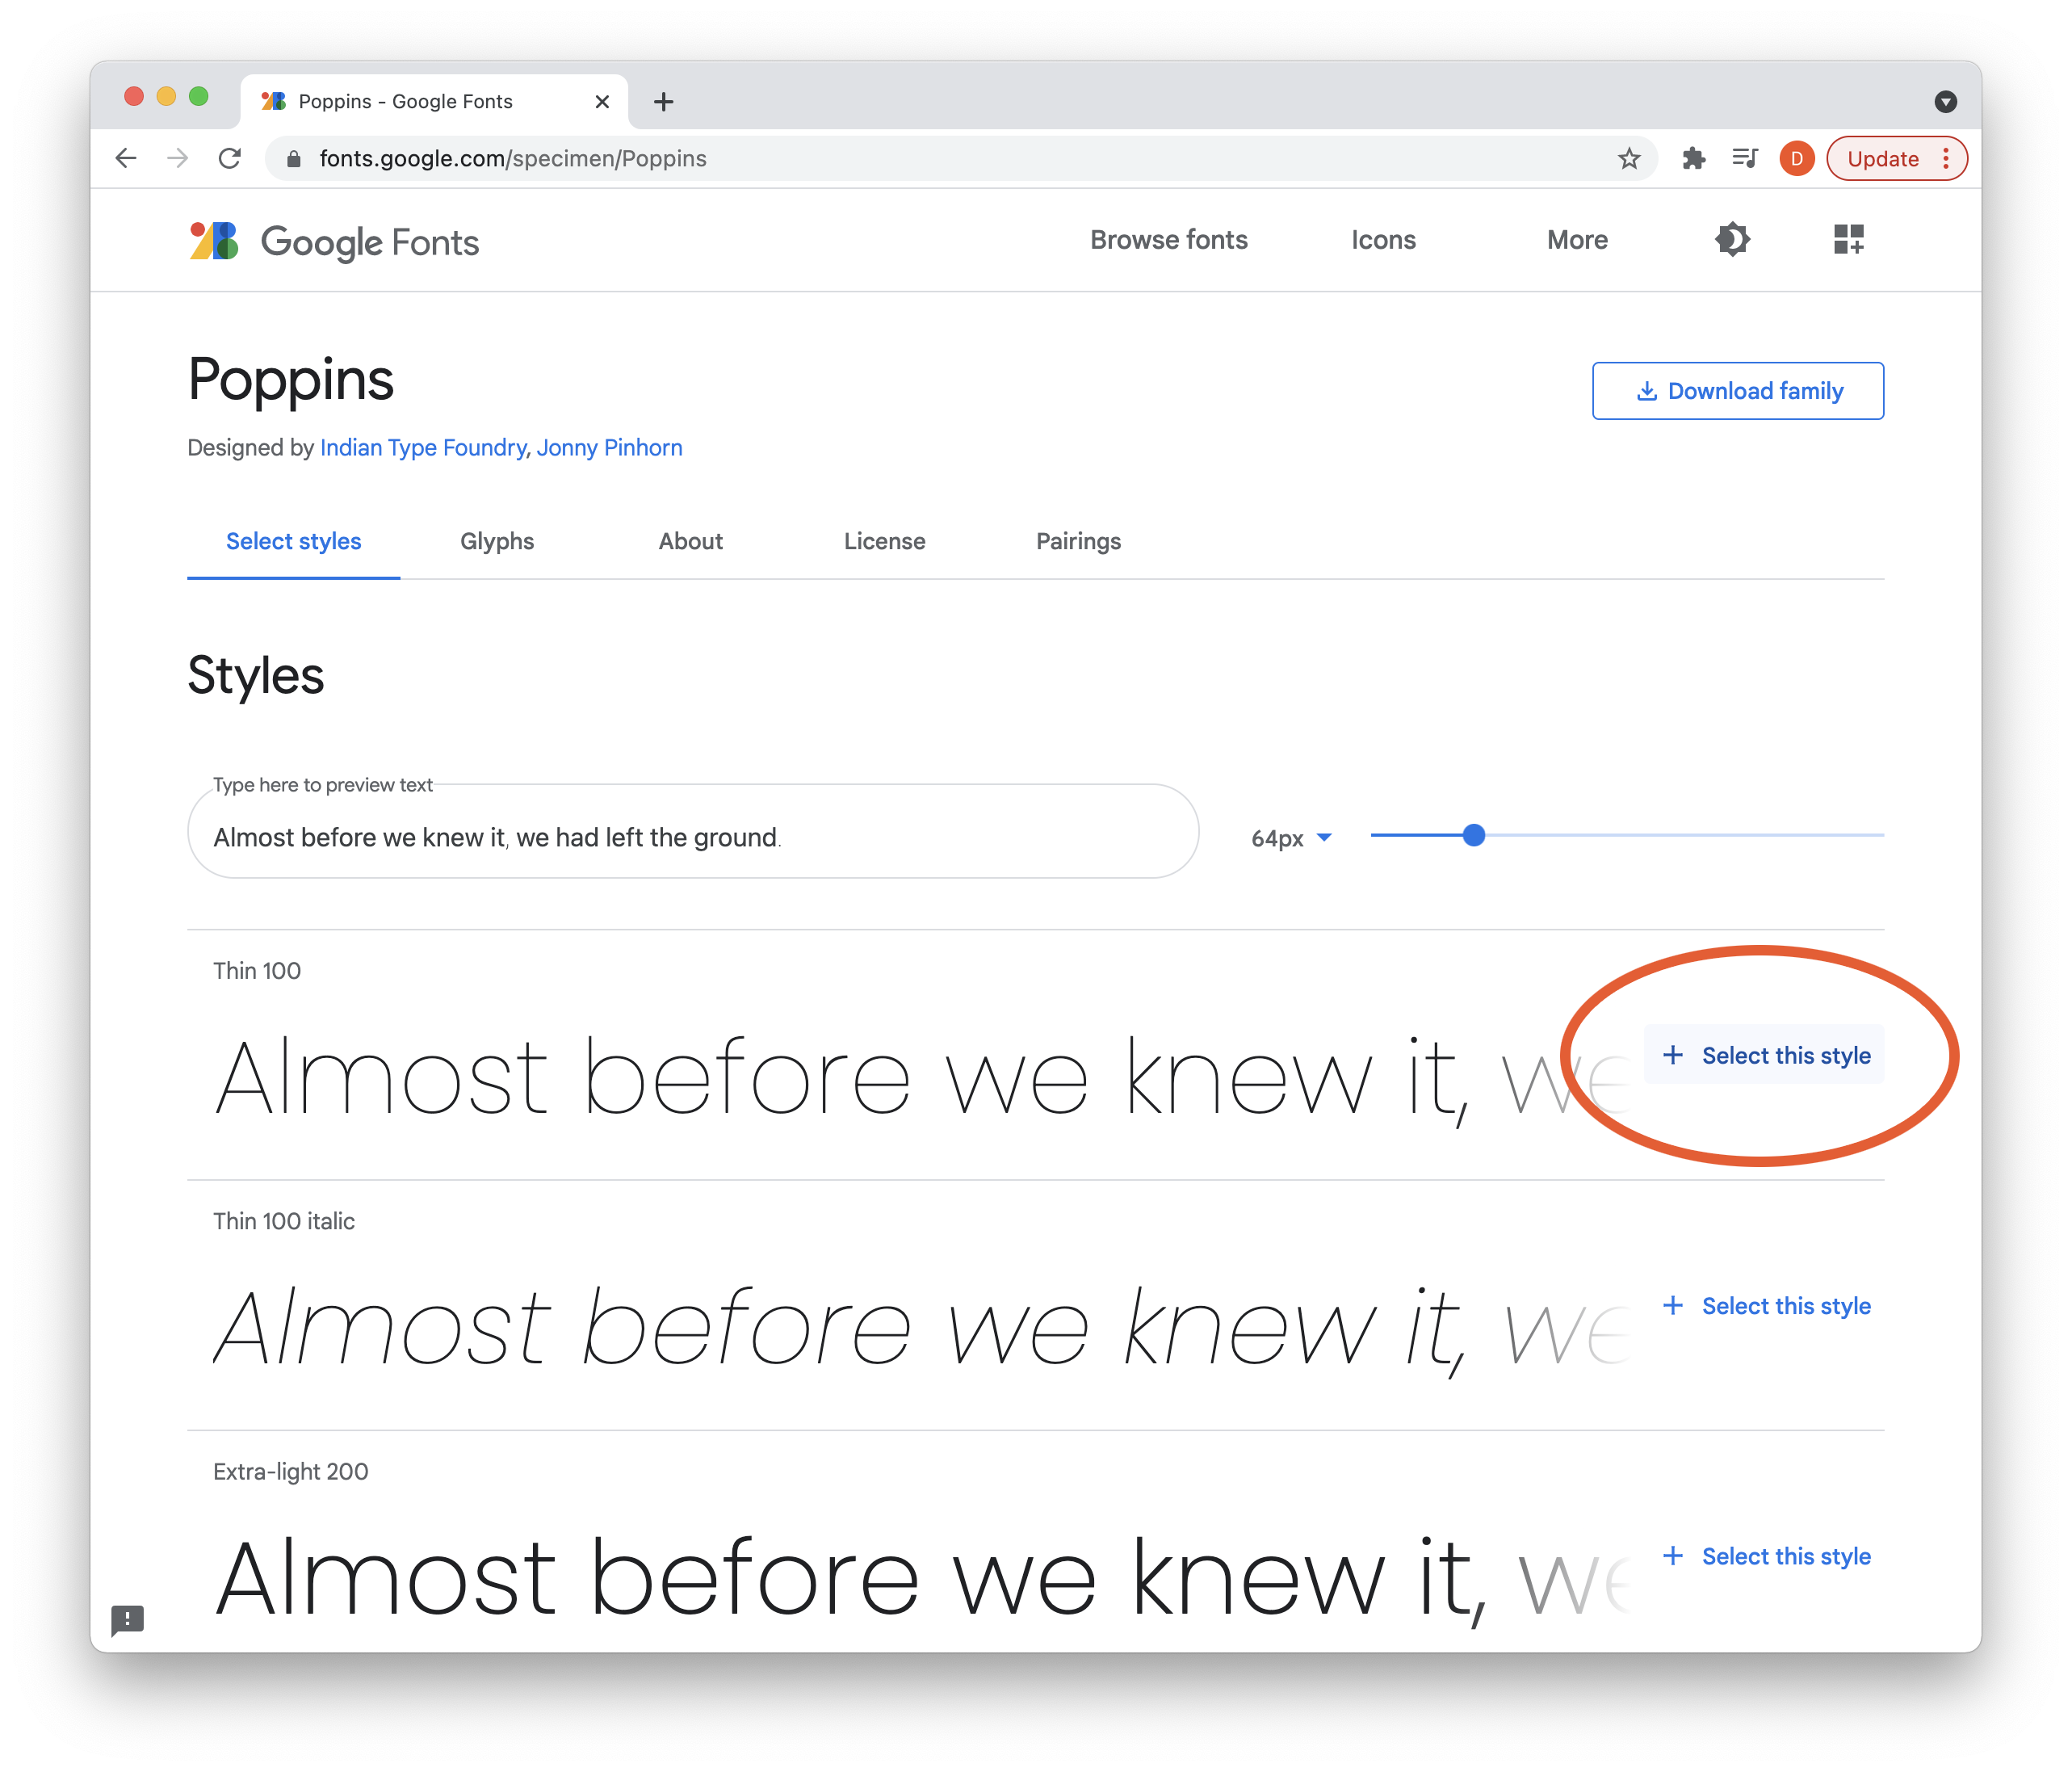
In a web browser, click up https://fonts.google.com/ (or the hosted font provider of your choice) and search for the font you intend to use. Click the link for “Select This Style” and a bar will appear toward the right side of your browser window.
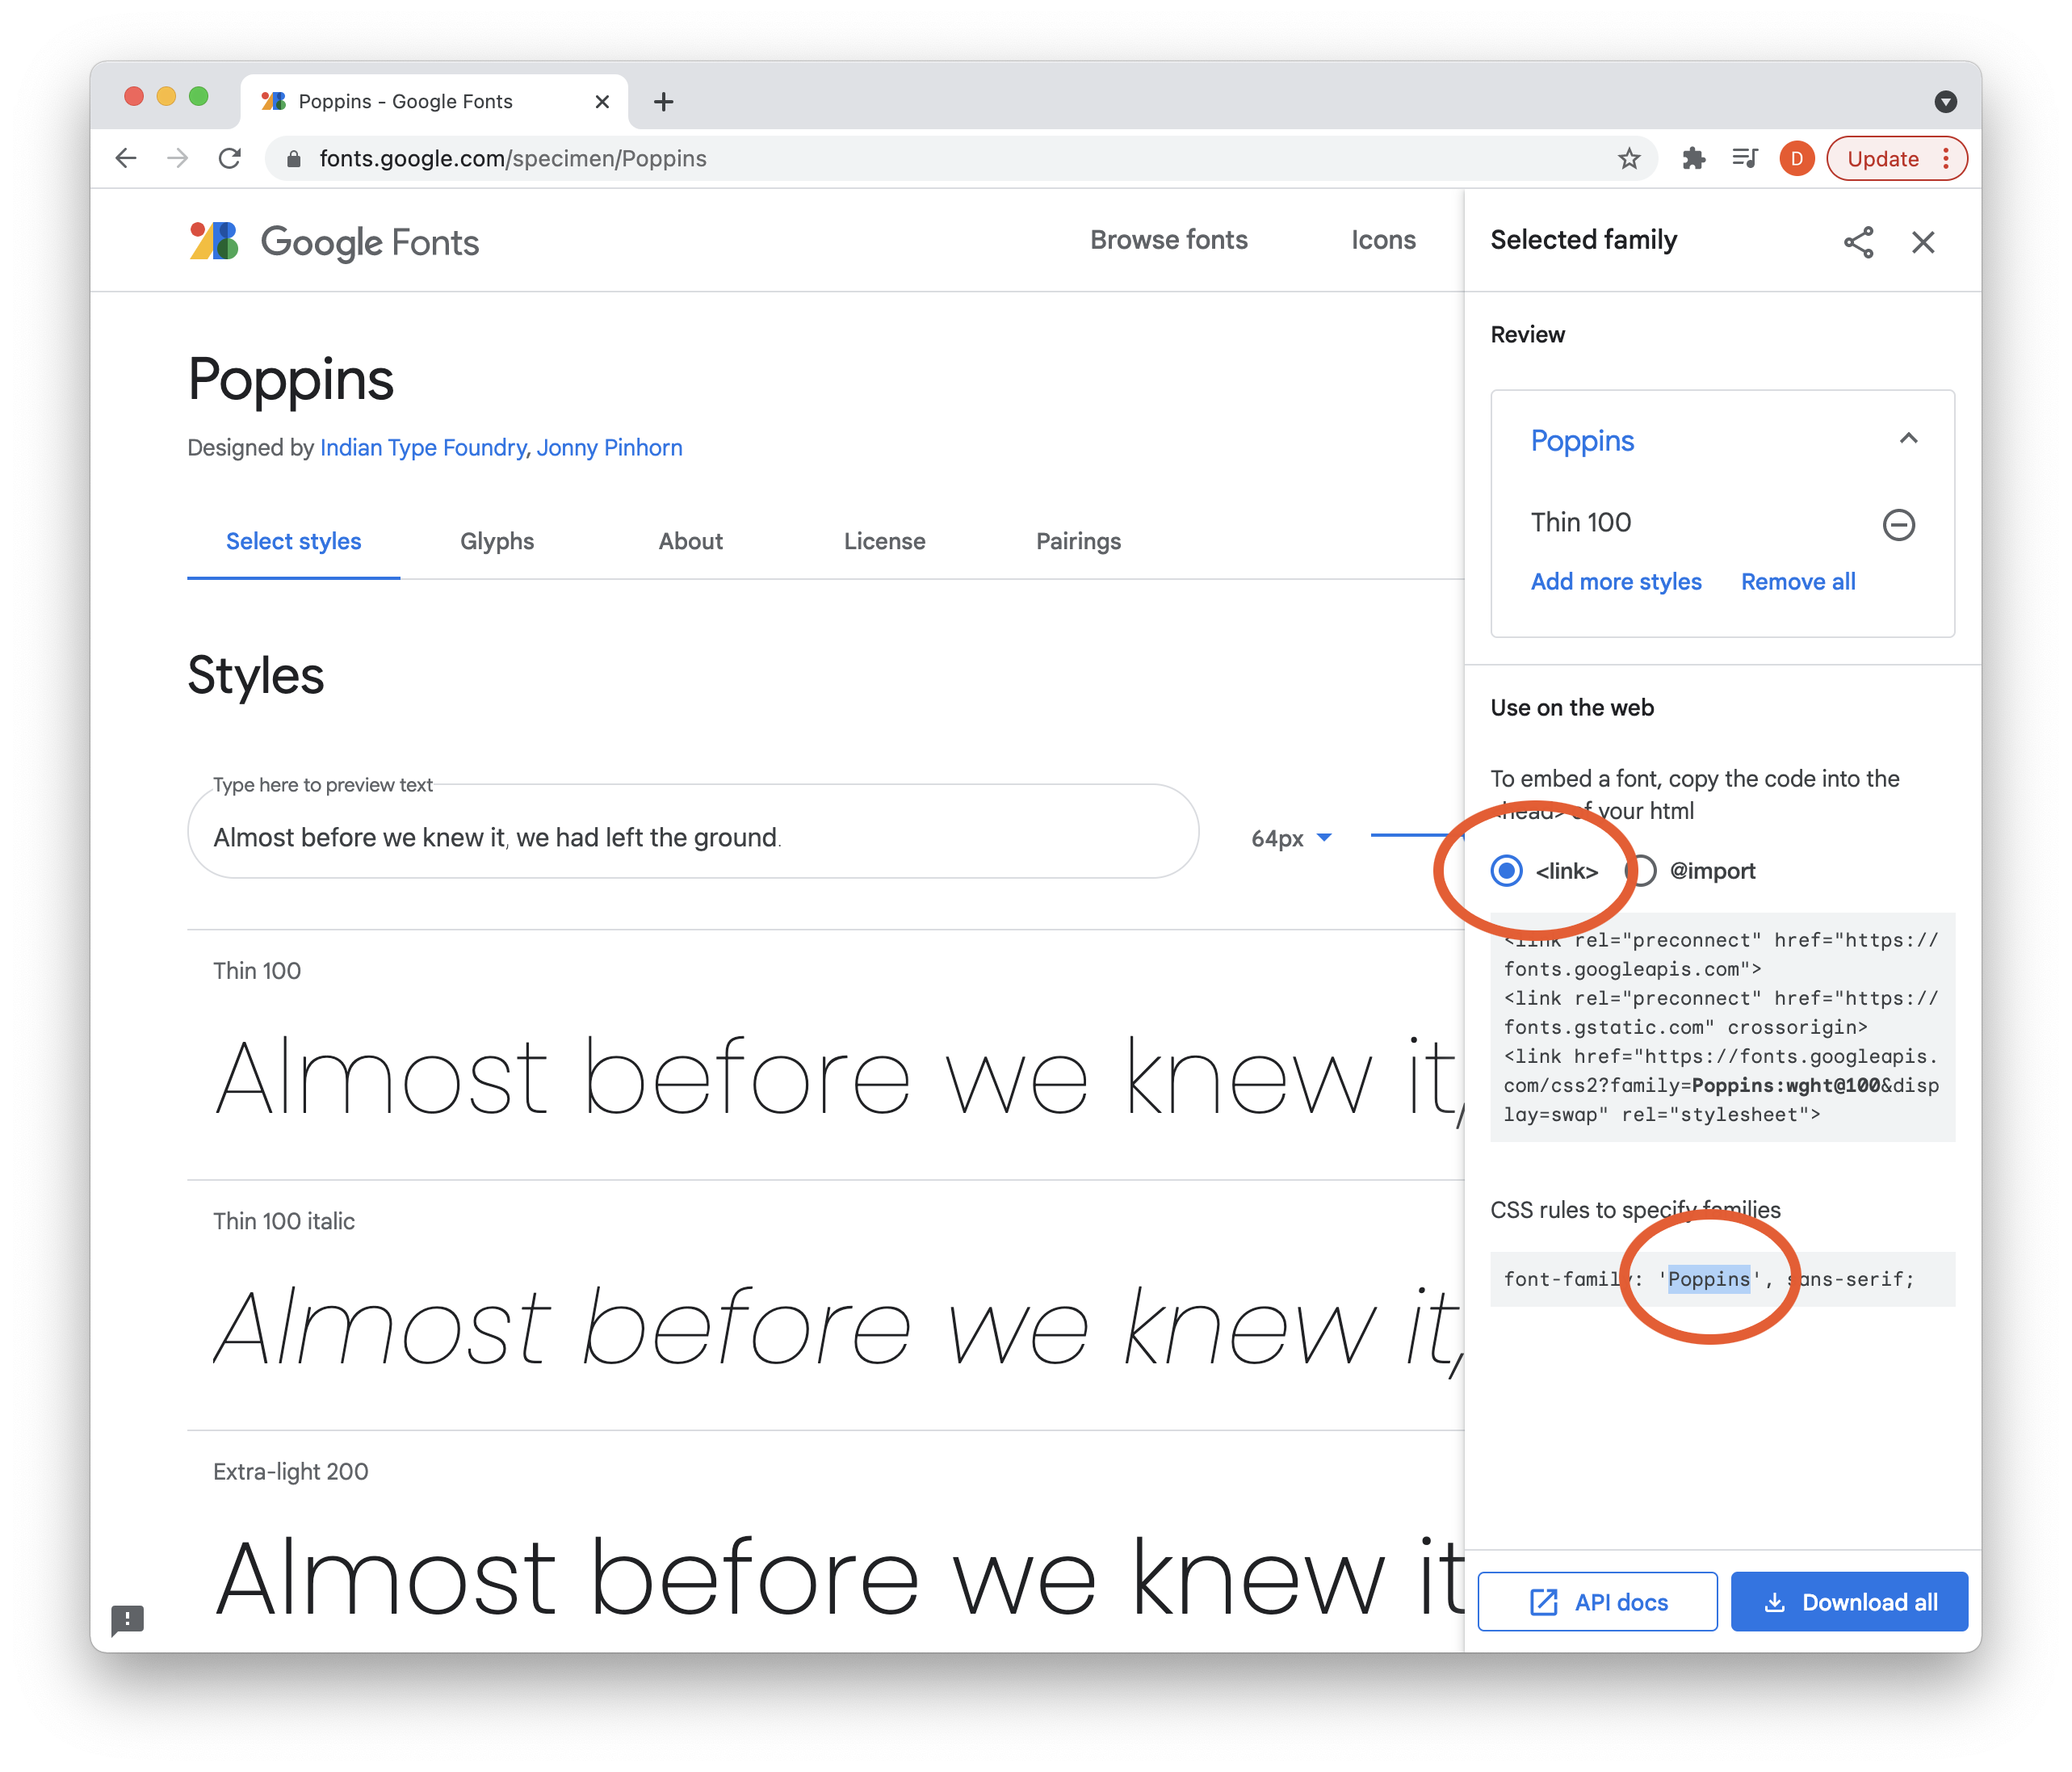
 In this pane, make sure the option for “<Link>” is selected. Select and copy the Font Family Name.
Step 4 — Link Font in Storytailor
Paste the Font Family Name in the appropriate spot in Storytailor.
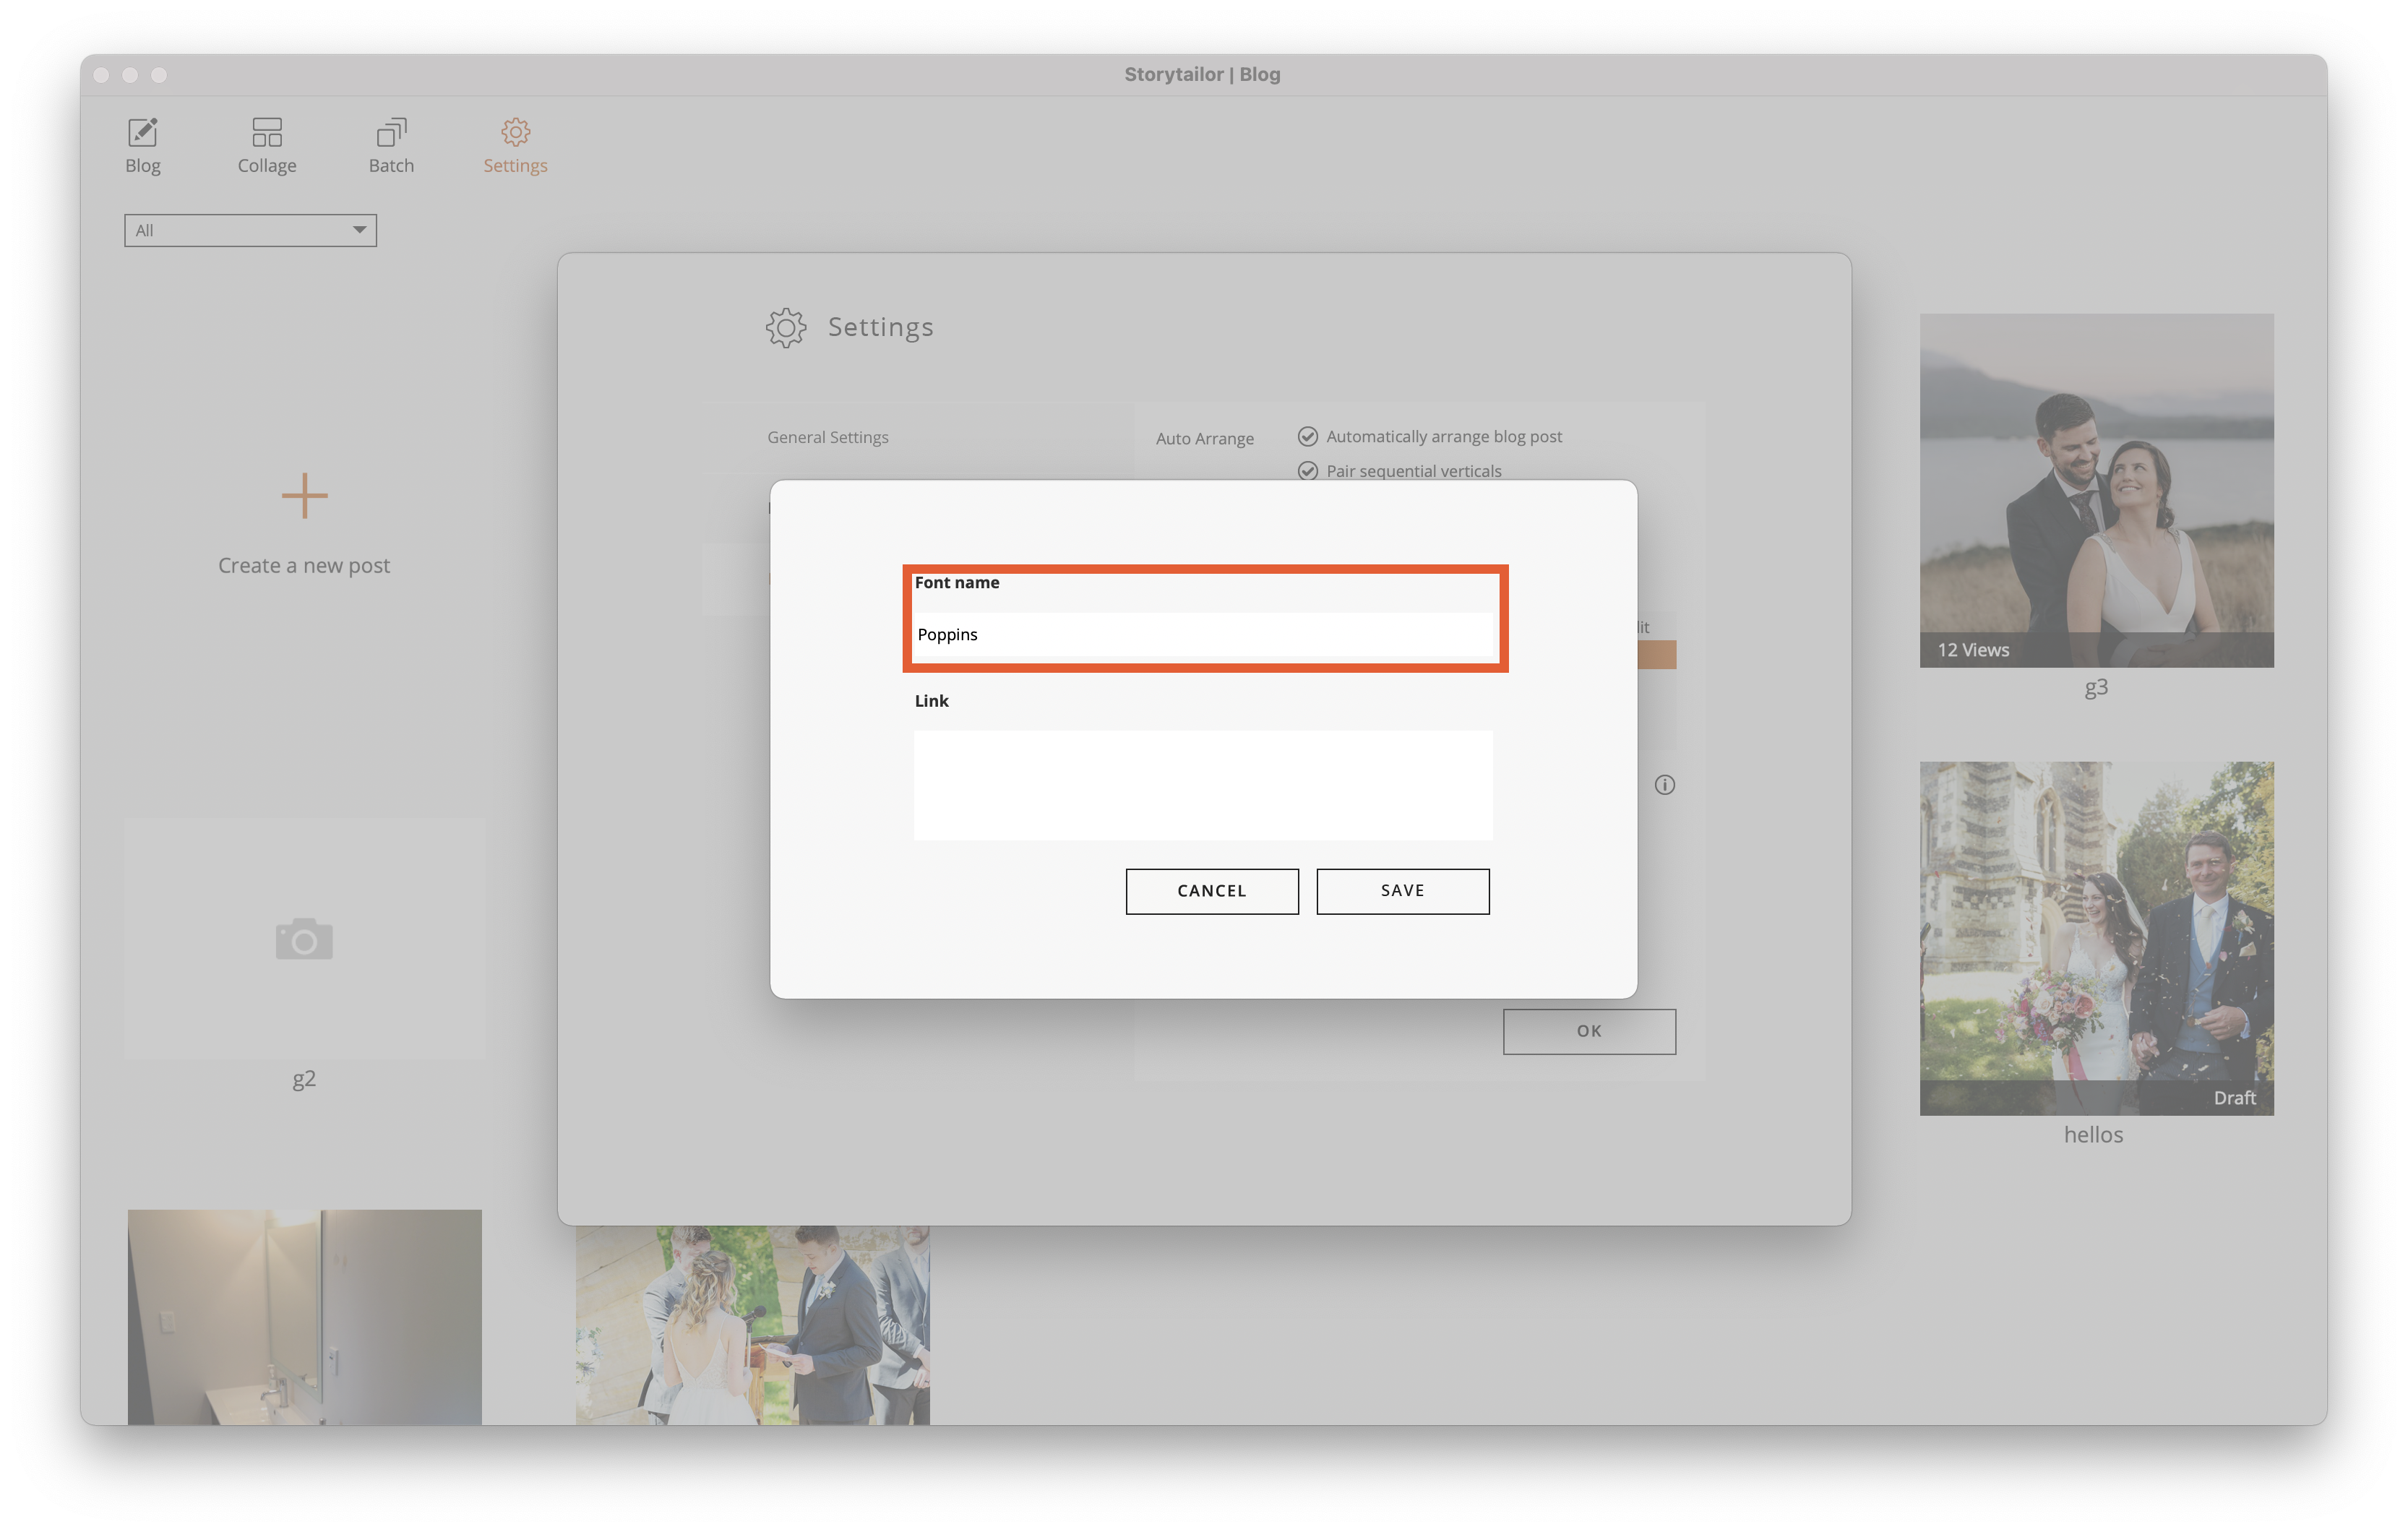
In your browser, select and copy the code in the marked box. 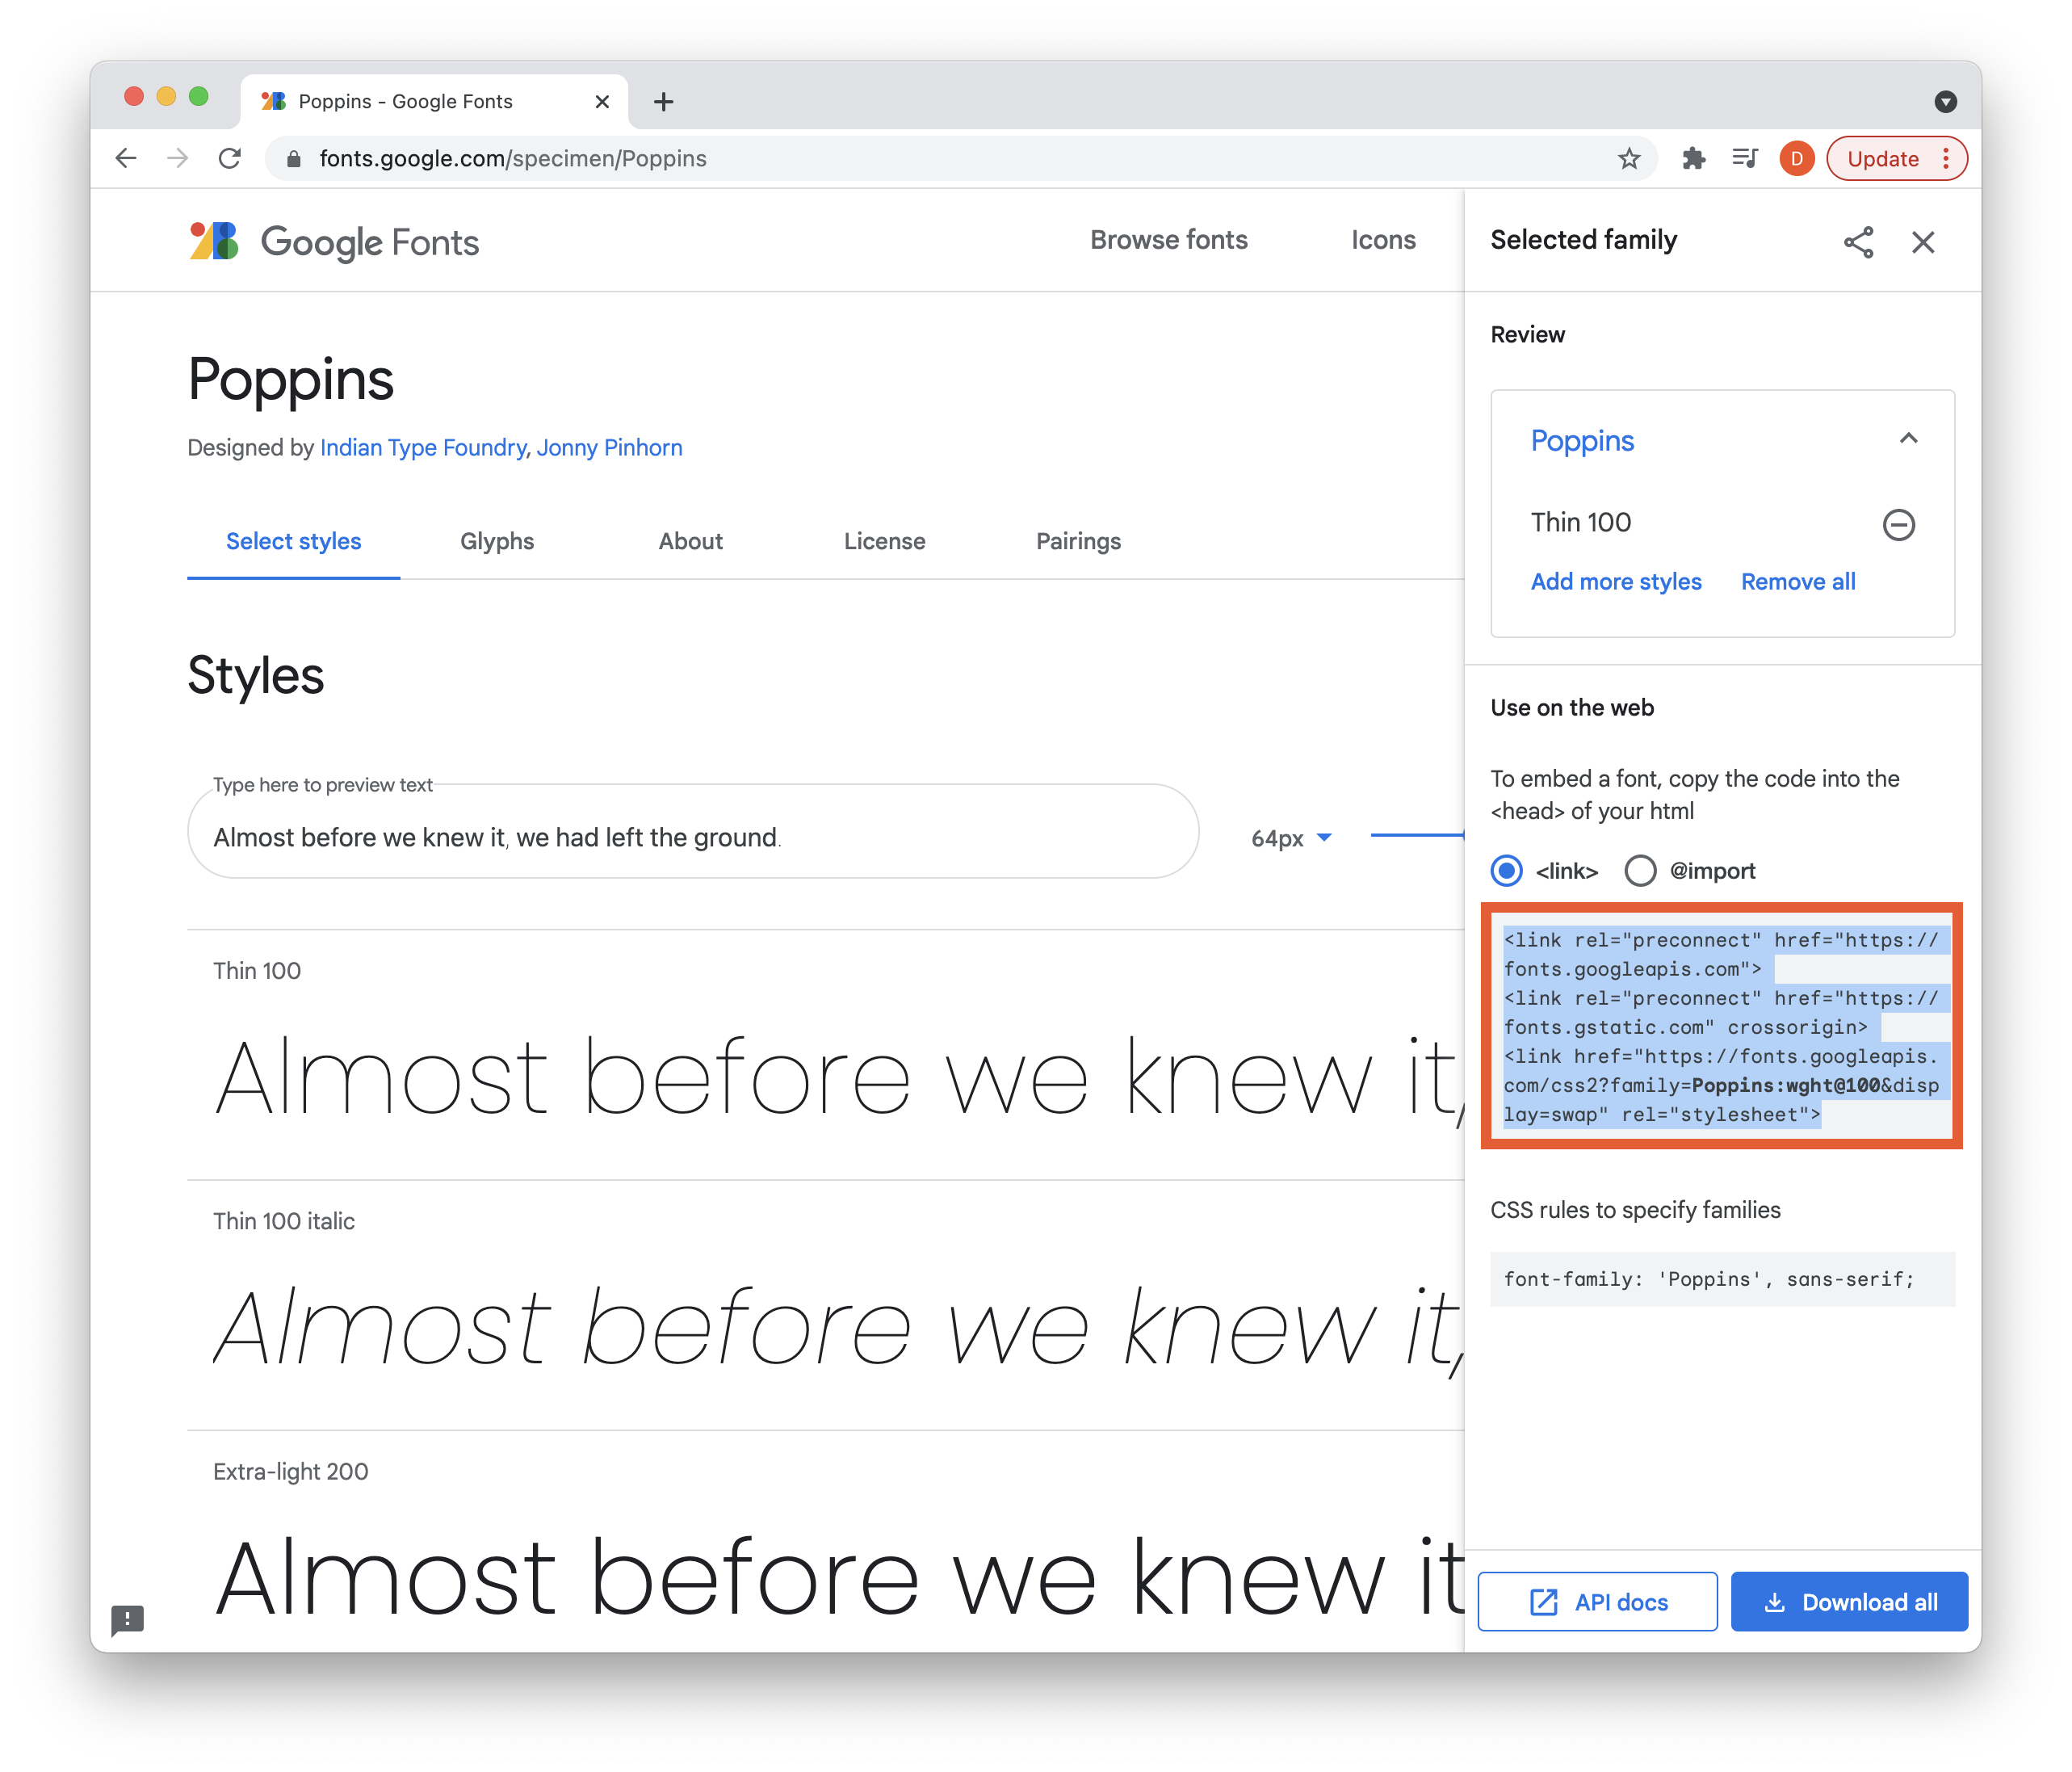 Then paste the copied code into the code box as shown.
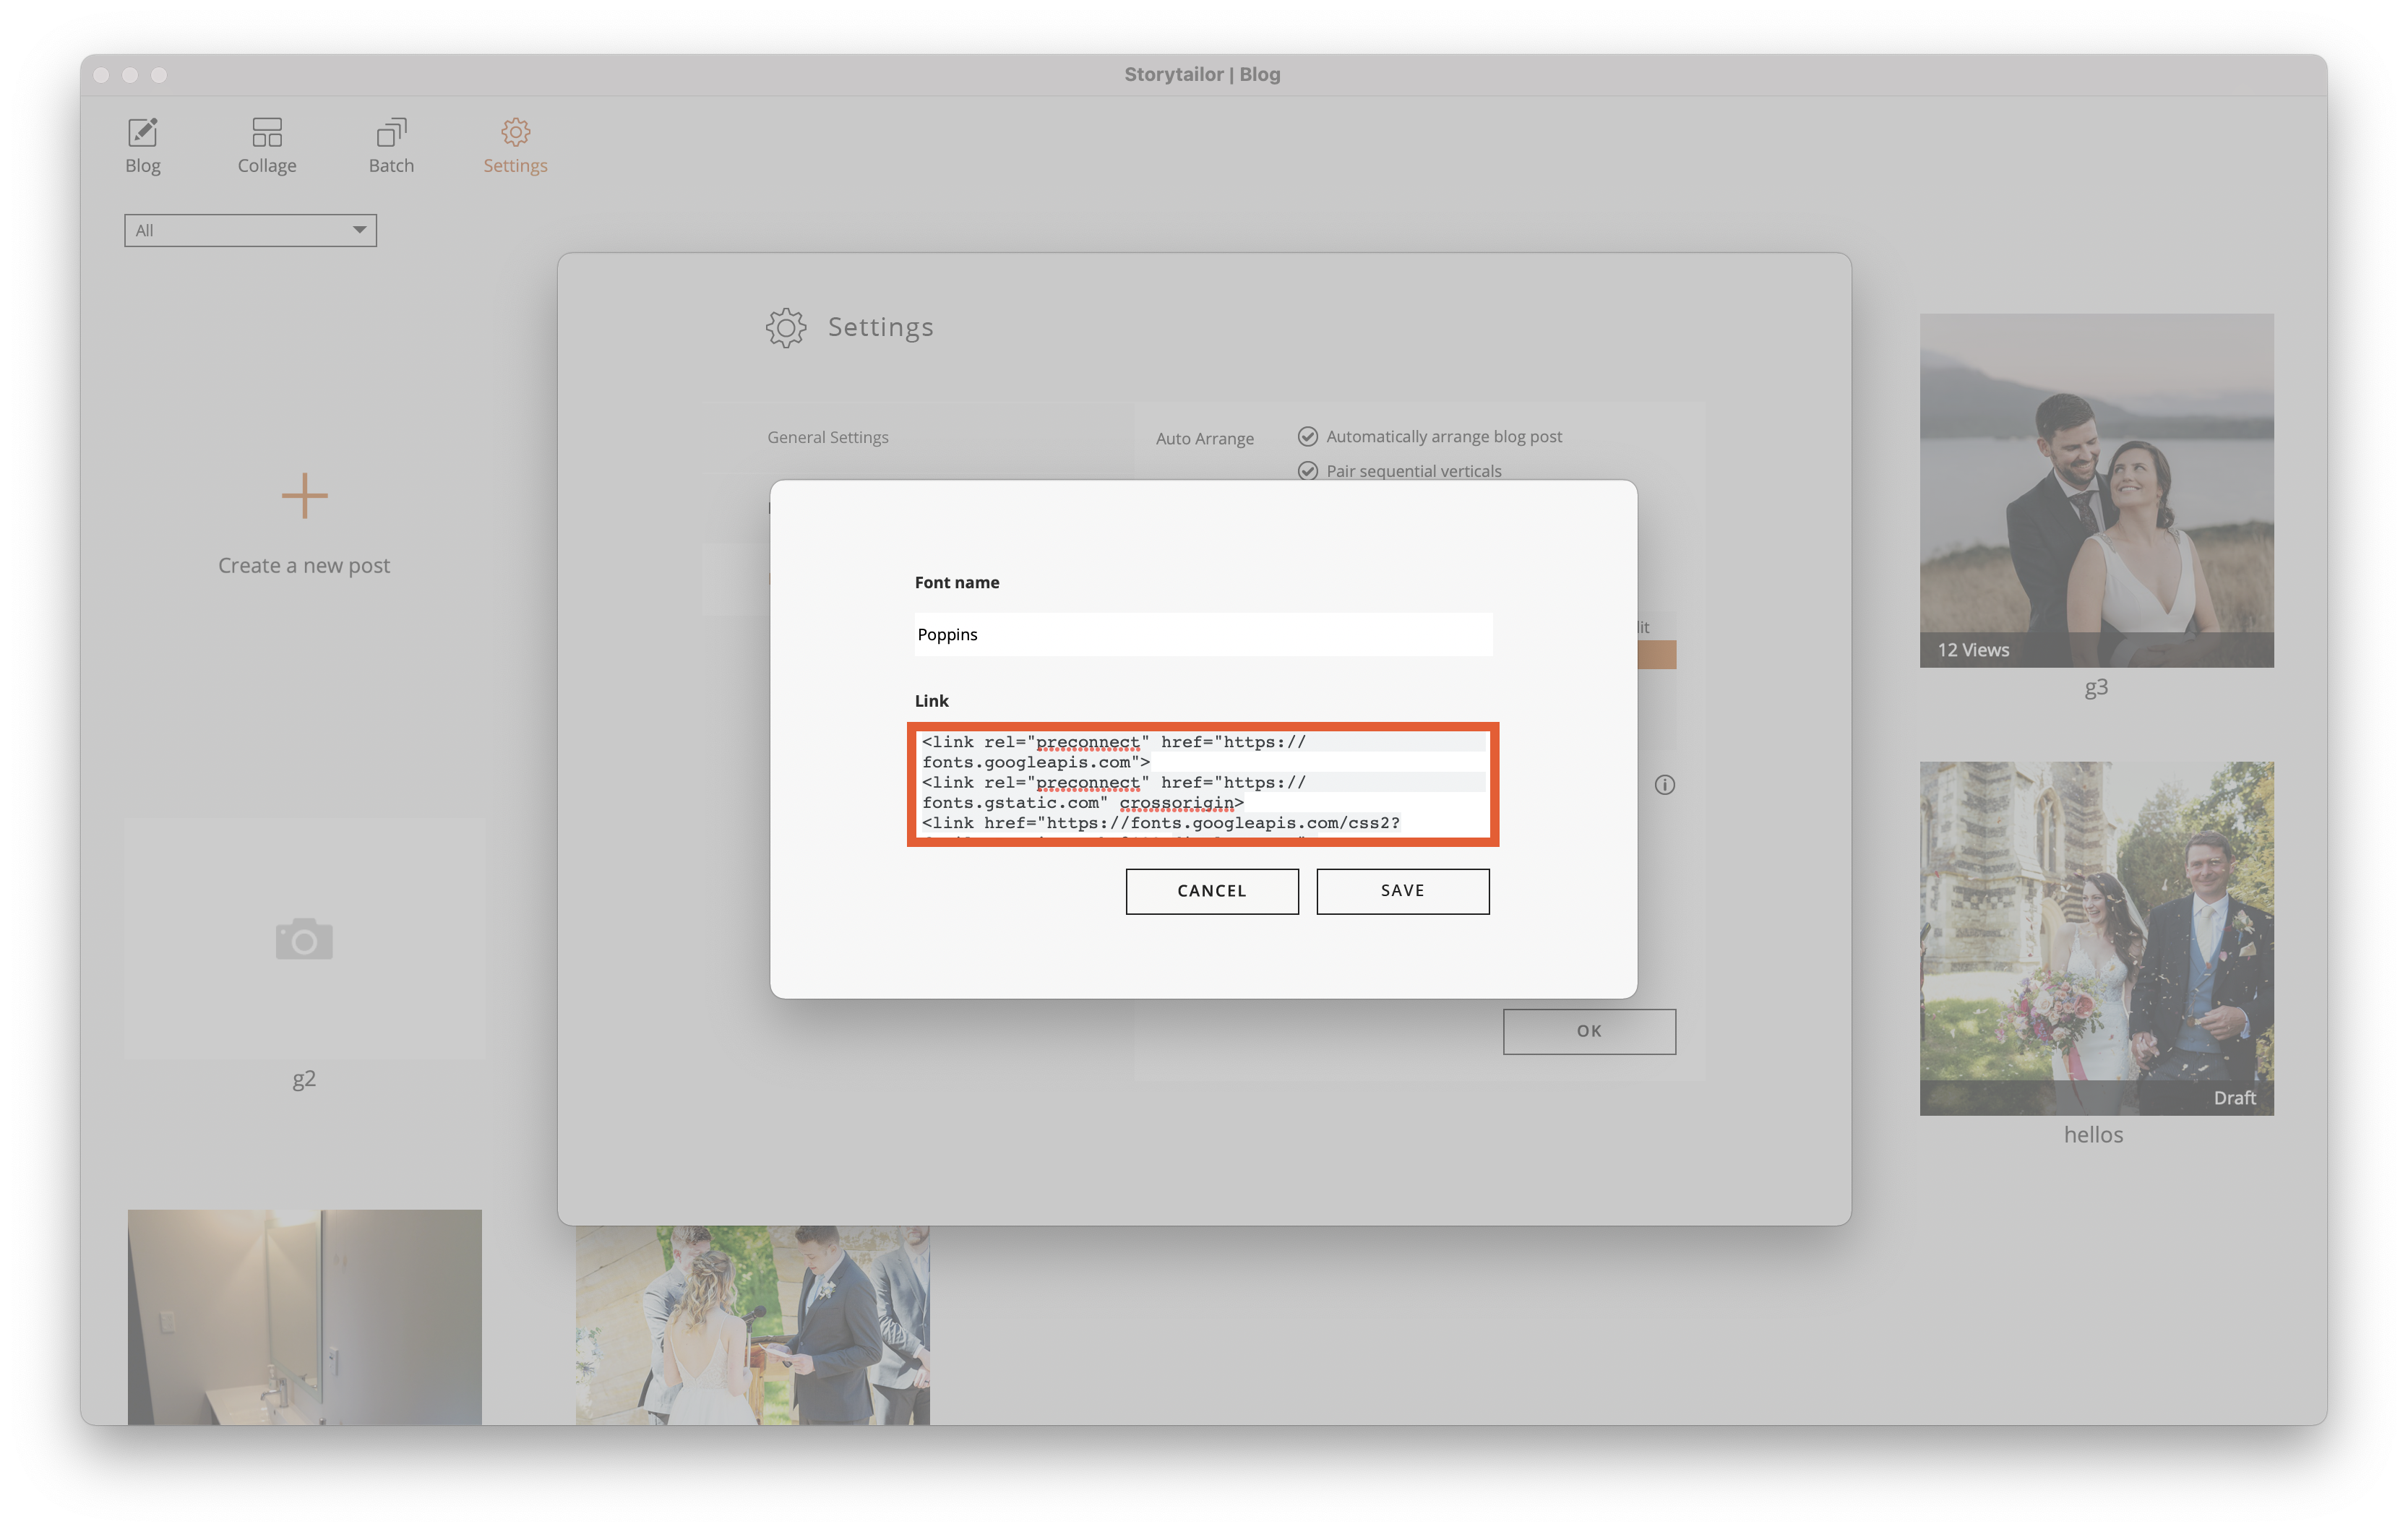 Click Save to close this pane, then click OK to close the Settings pane.
Step 5 — Font Selection in Storytailor
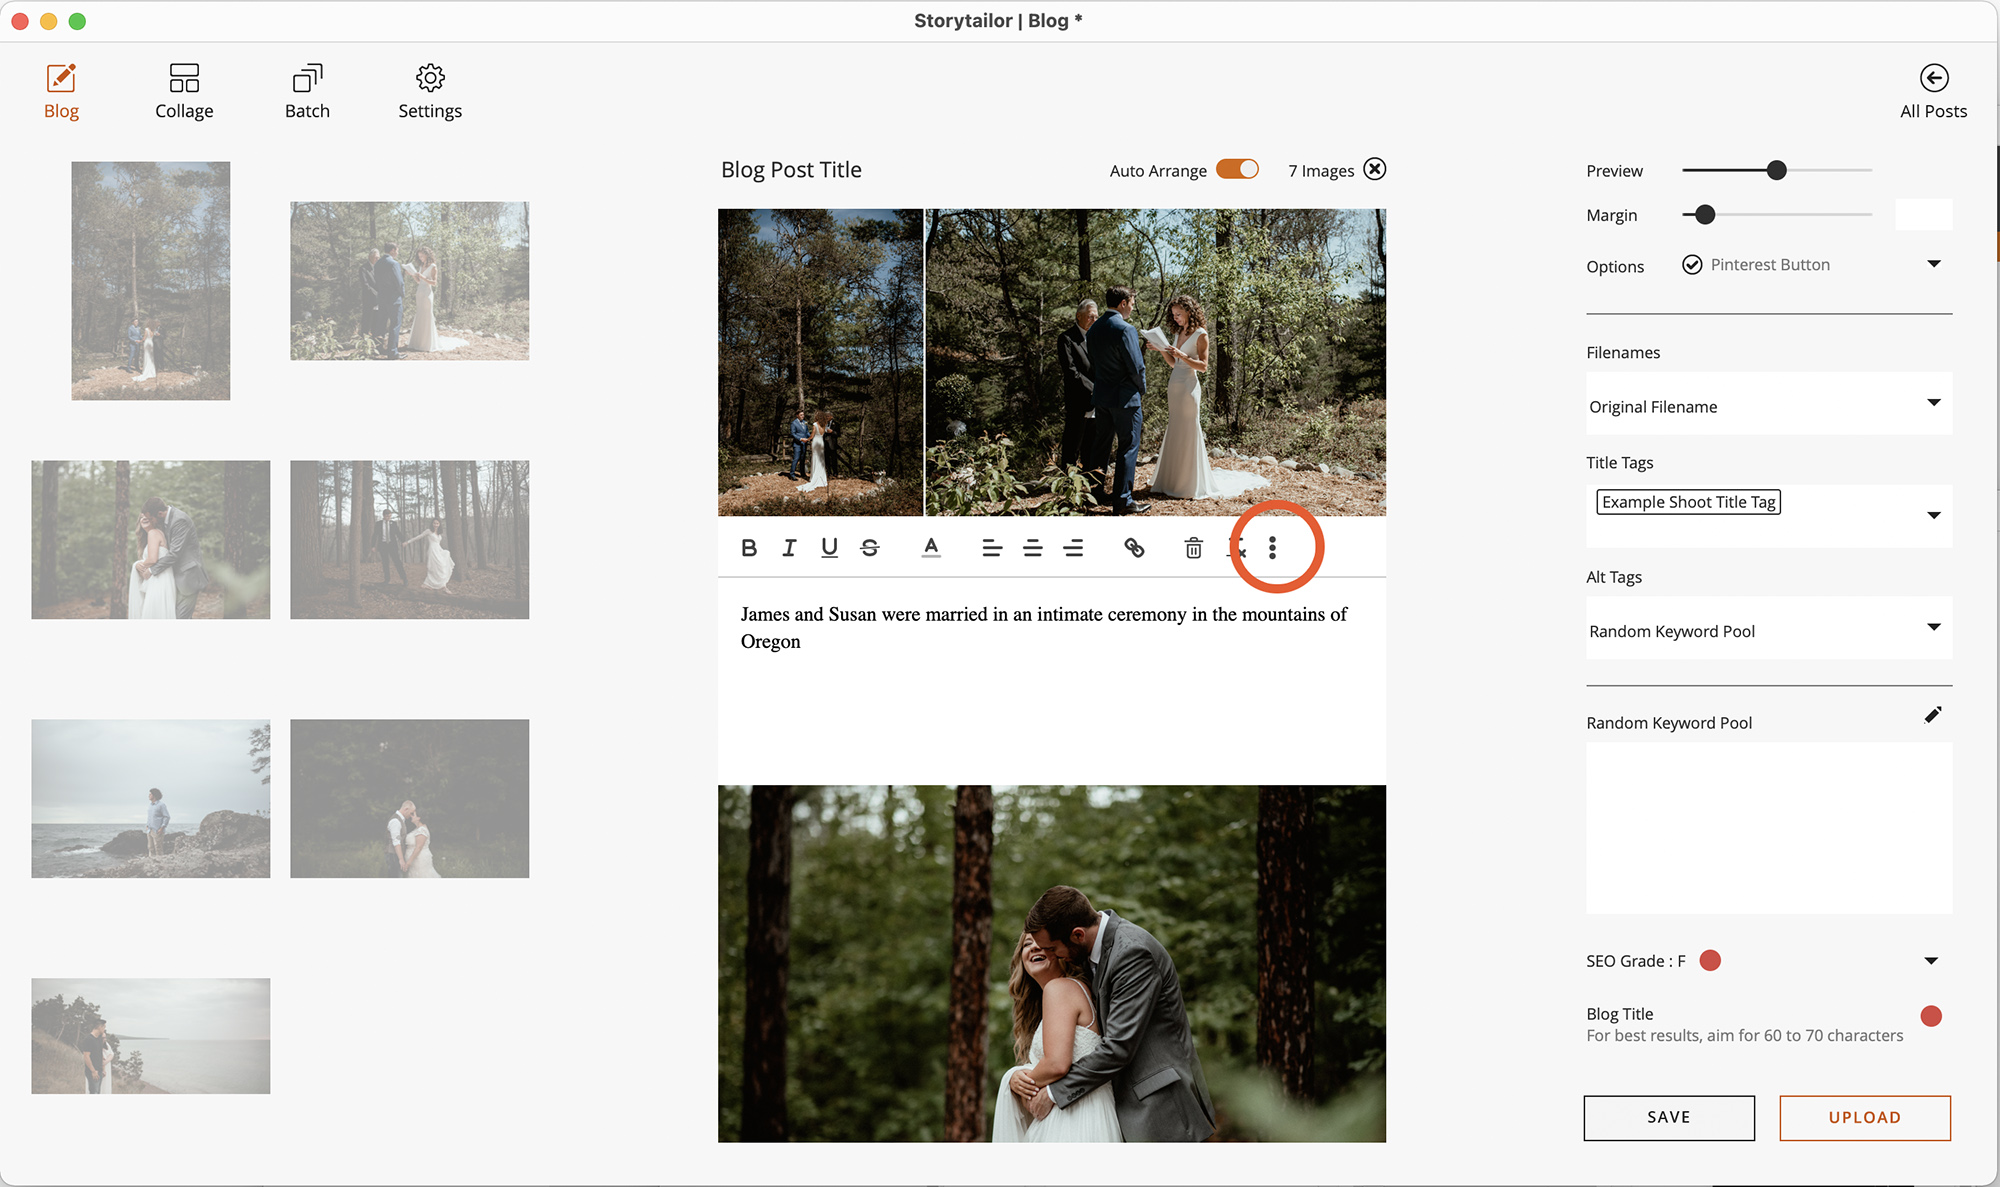
Now, when entering text copy in a blog post, select the new font you’ve added in the text tools bar. Click the three dots to expand the tool bar and use the drop-down to select your font.
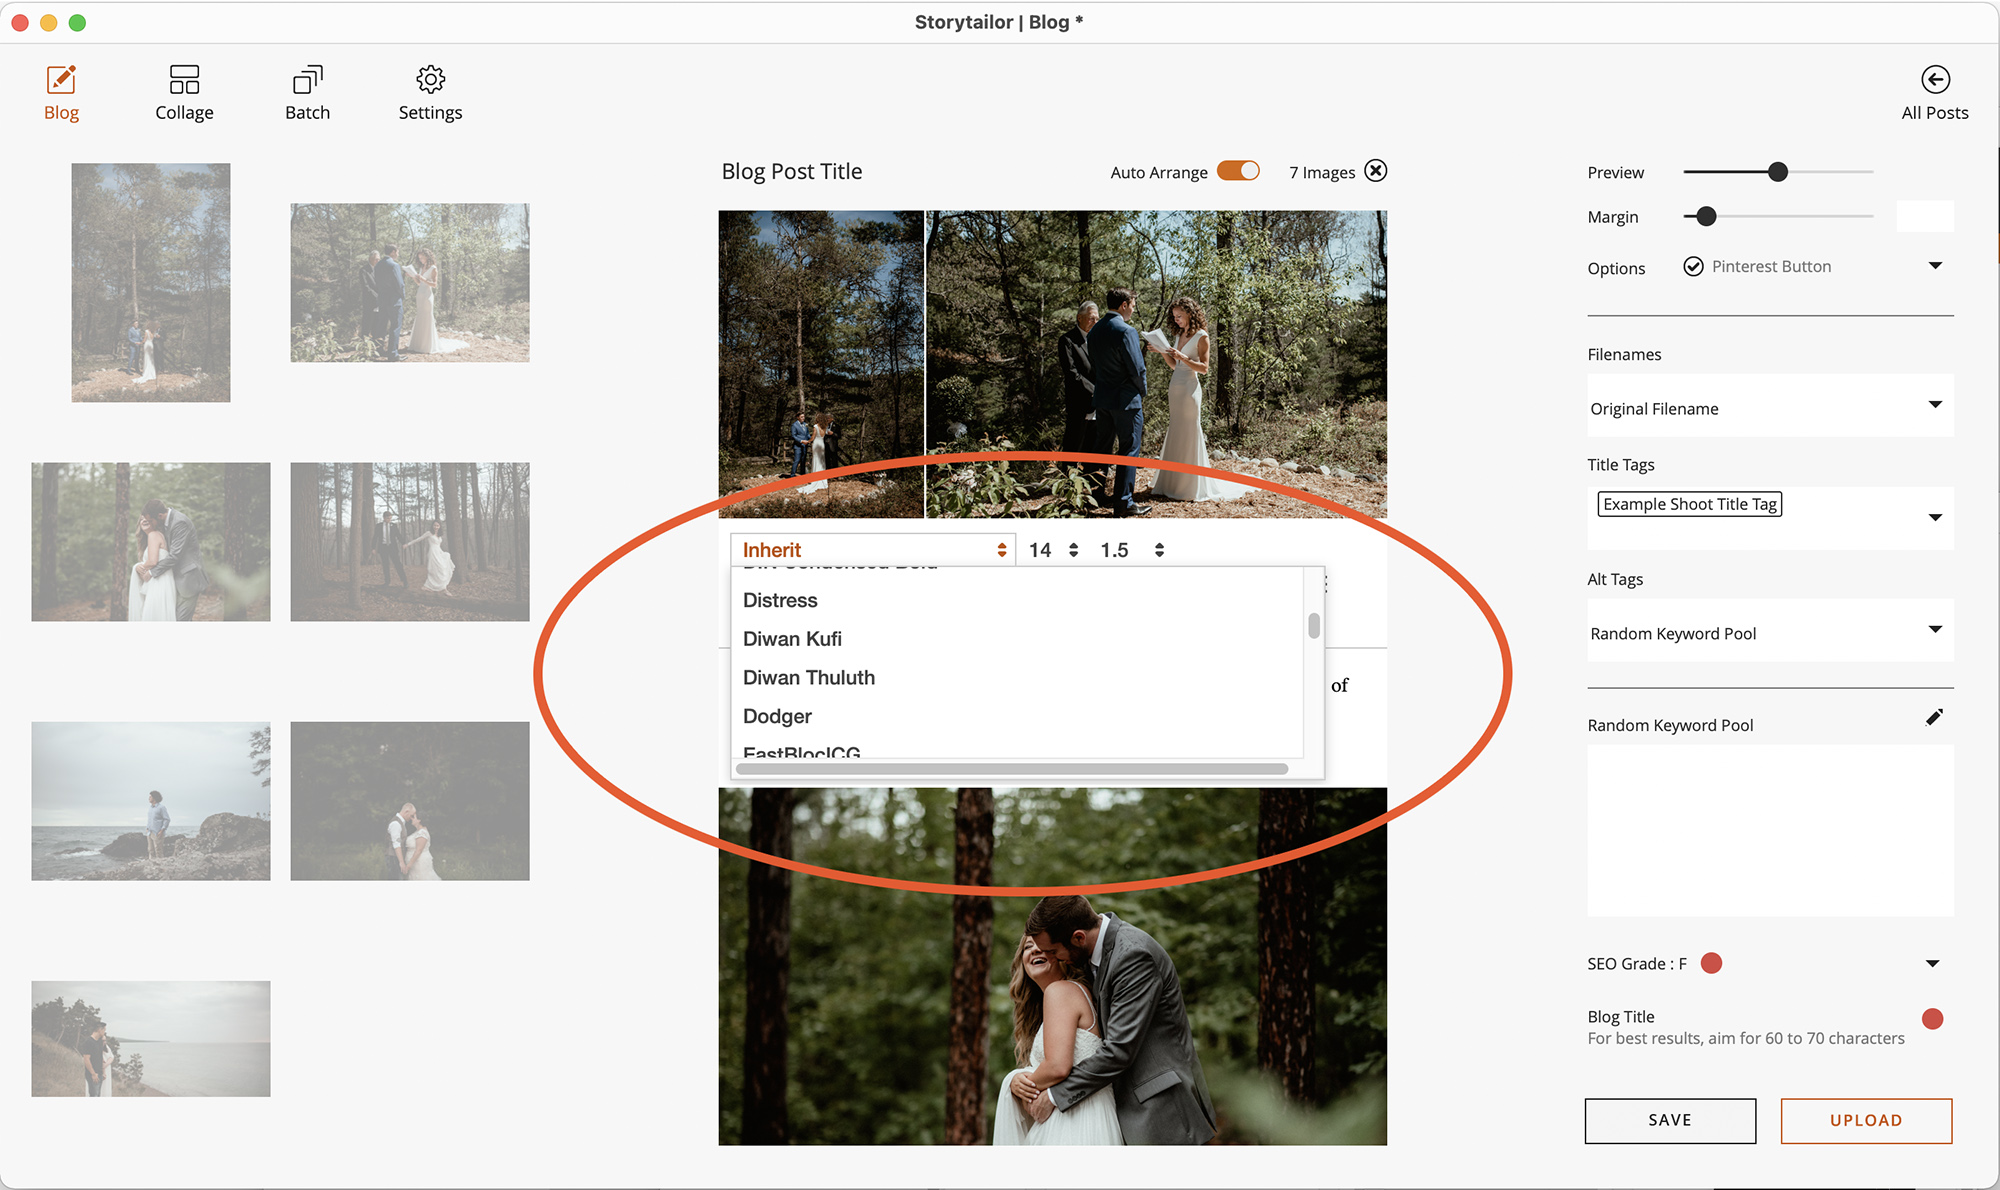
If successful, the font will display in-app and on your site.